Design your own Bespoke Roman Blinds with our Step By Step Guide
Step by Step Guide
Step 1
Design Style
Boeboes luxury soft furnishings creates a stylish, practical and wonderfully simple interpretation of a classic bespoke Roman Blind that has evolved to become the window treatment of choice in almost every home.
At boeboes, we offer blinds in 2 styles
Blind Style


Chain Color


Chain Position


Step 2
Fabric Choice
Boeboes Roman blinds are available in a variety of colours within our Linen, Herringbone wool, and Plain wool collections. Simply scroll through our range and make your selection. If you have selected to design a banded blind, we also offer velvet fabric as a band option. Once you have selected your main blind fabric, configure your blind and then play around with the different band fabrics to choose from!

Sea Gyspy Rose
£261.00

Sea Gypsy Teal
£261.00

Light Linen Blush (un-lined)
£223.00

Light Linen Lily (un-lined)
£223.00

Light Linen Oat (un-lined)
£223.00

Light Linen Sea Breeze (un-lined)
£223.00

Light Linen Ink (un-lined)
£223.00

Light Linen Eucalyptus (un-lined)
£223.00

Light Linen Olive (un-lined)
£223.00

Light Linen Pistachio (un-lined)
£223.00

Light Linen Clay (un-lined)
£223.00

Light Linen Sand (un-lined)
£223.00

Light Linen Silver (un-lined)
£223.00

Light Linen Dove (un-lined)
£223.00

Linen Grey Stripe
£231.00

Linen Navy Stripe
£231.00

Linen Plain Ivory
£231.00

Linen Flax
£231.00

Linen Grey
£231.00

Linen Blue
£231.00

Wool Porcelain
£223.00

Wool Linen
£223.00

Wool Forest
£223.00

Wool Rust
£223.00

Wool Blue
£223.00

Herringbone Moss
£261.00

Herringbone Mustard
£261.00

Herringbone Rust
£261.00

Herringbone Rosetta
£261.00

Herringbone Slate
£261.00

Herringbone Aqua
£261.00

Step 3
Measurements
We’ve put a lot of thought in to help make measuring easy for you! Follow our measuring guide and enter your measurements. This will instantly calculate the price for you and then you’re ready to place your order!
There are 2 options when it comes to deciding where you want your roman blind to sit in front of a window.
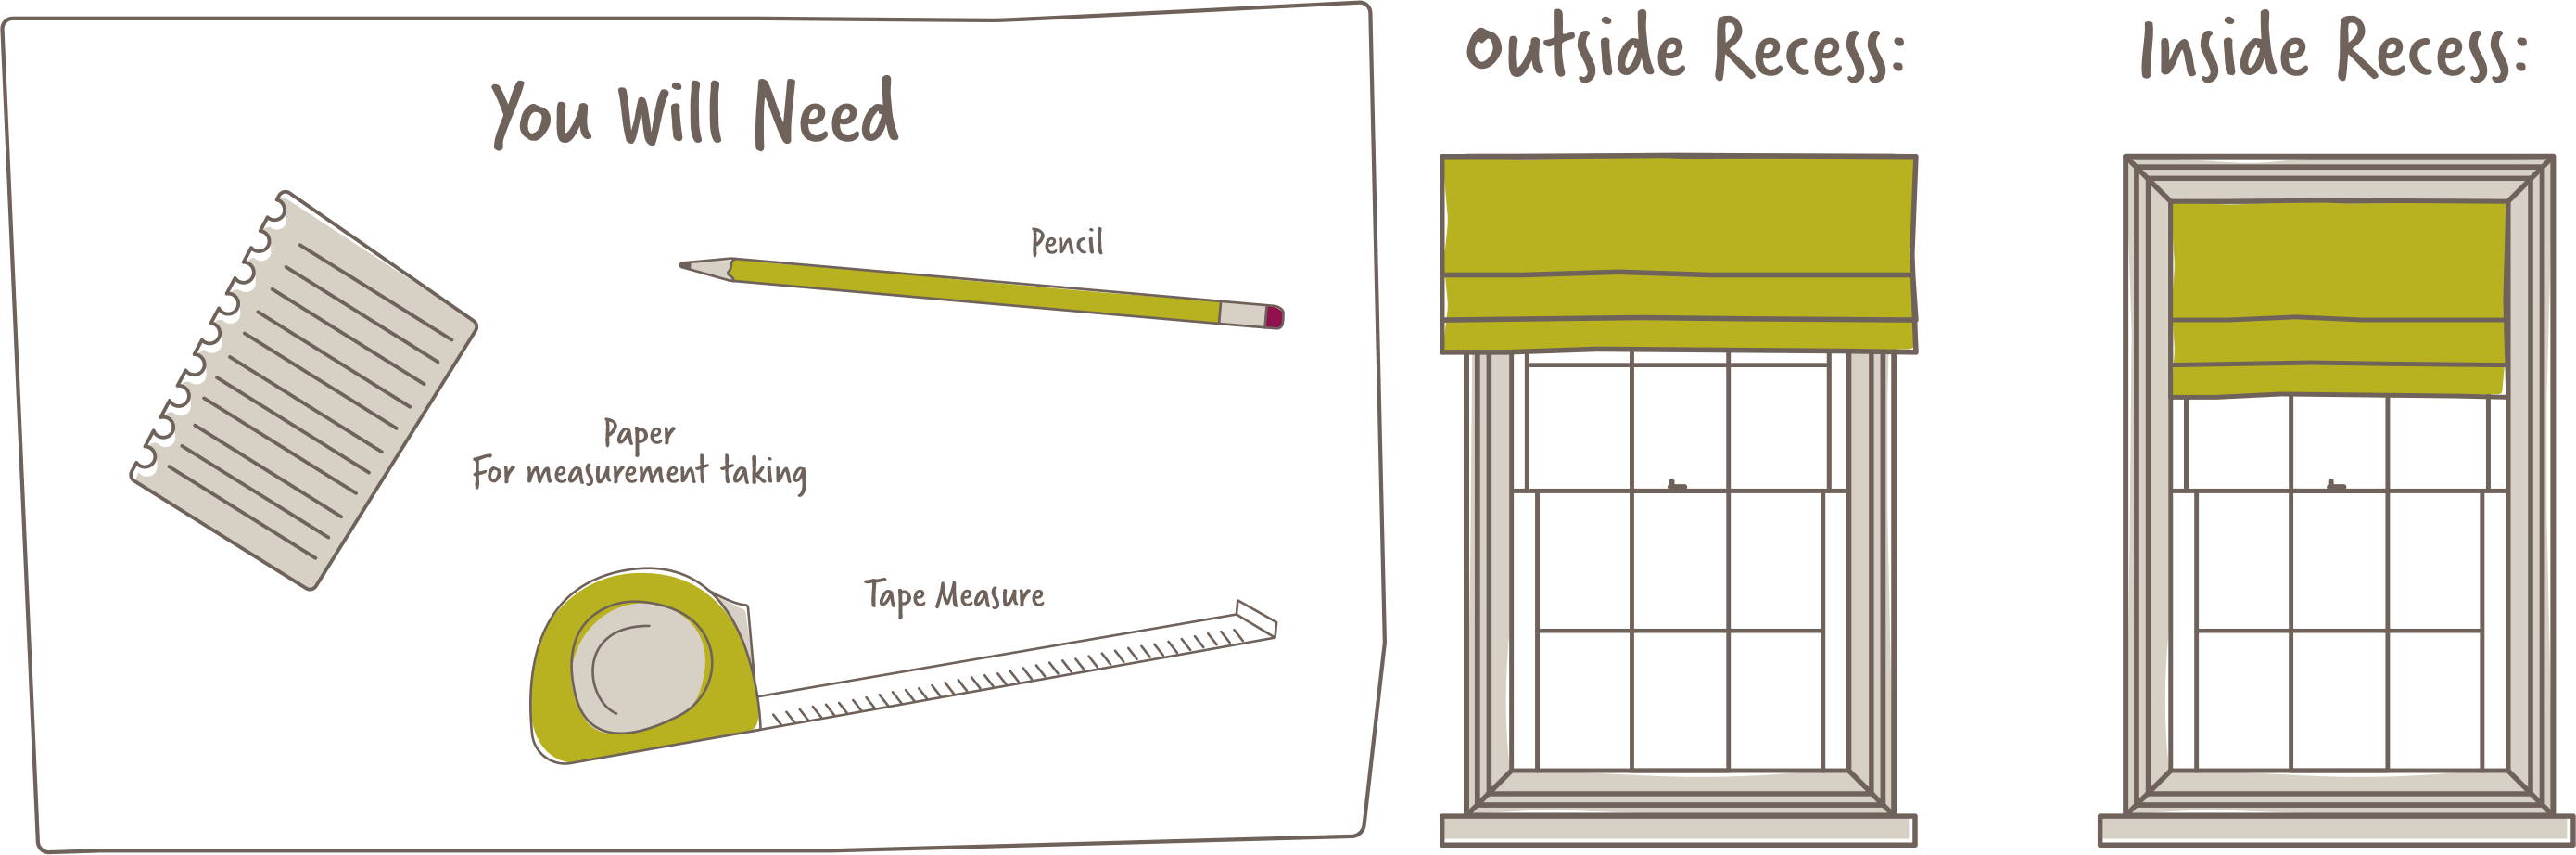
I'm measuring...
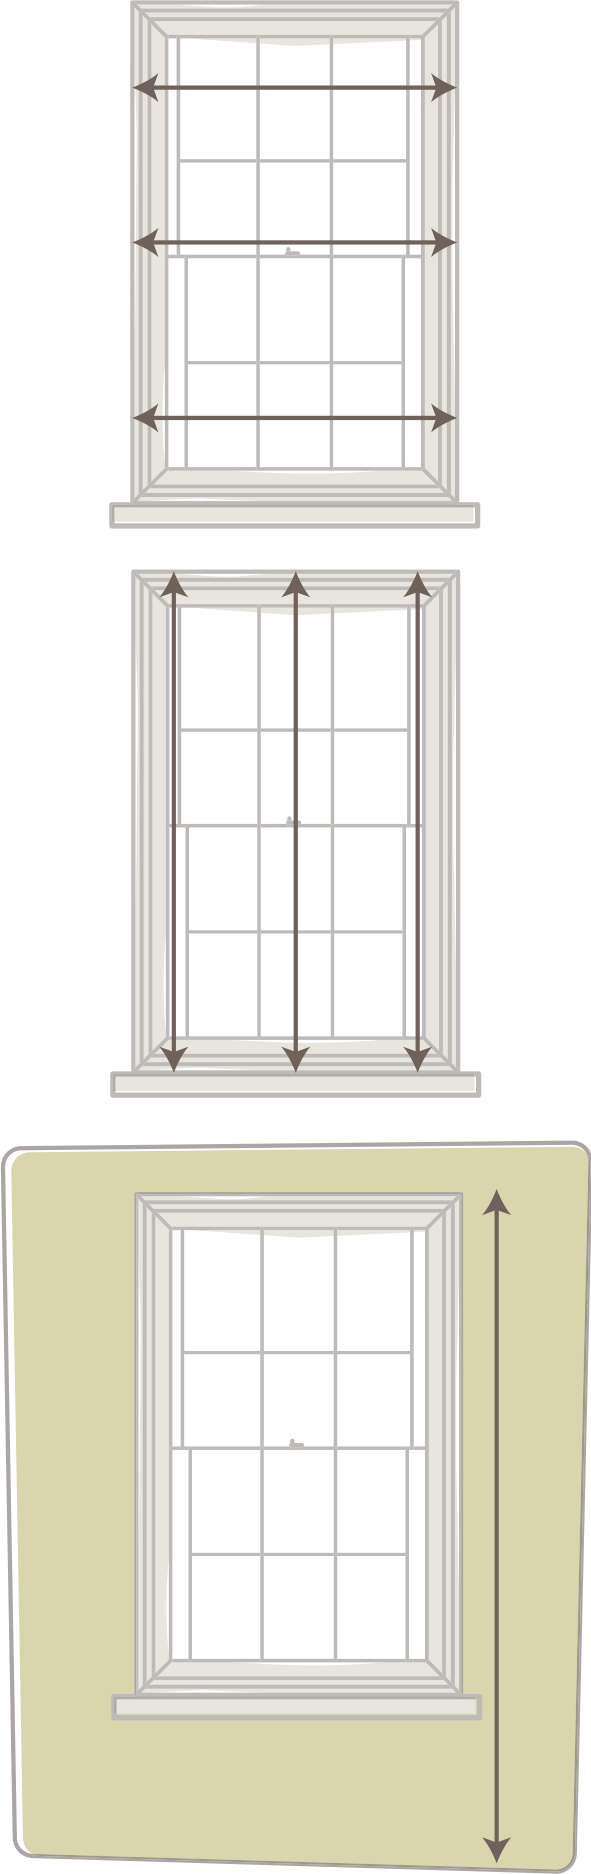
- Using a metal tape measure, measure at three points within the recess (top, middle and bottom) from wall to wall.
- Subtract 1.5cm from the narrowest width of the three wifth measurements taken in step one. This will be the width measurement you supply us.
- To measure the drop, measure at three points (left hand side, middle and right hand side) between the wall and the window sill. You only need to give us the shortest drop measurement taken. There is no need to subtract anything.
- Then, simply decide which side you would like the chain to hang.
- Lastly, we'd like to know your installation height. This is the height from the floor to the top of the window and helps us determine how long to make your chain so you don't have to reach up too high to work your blind!
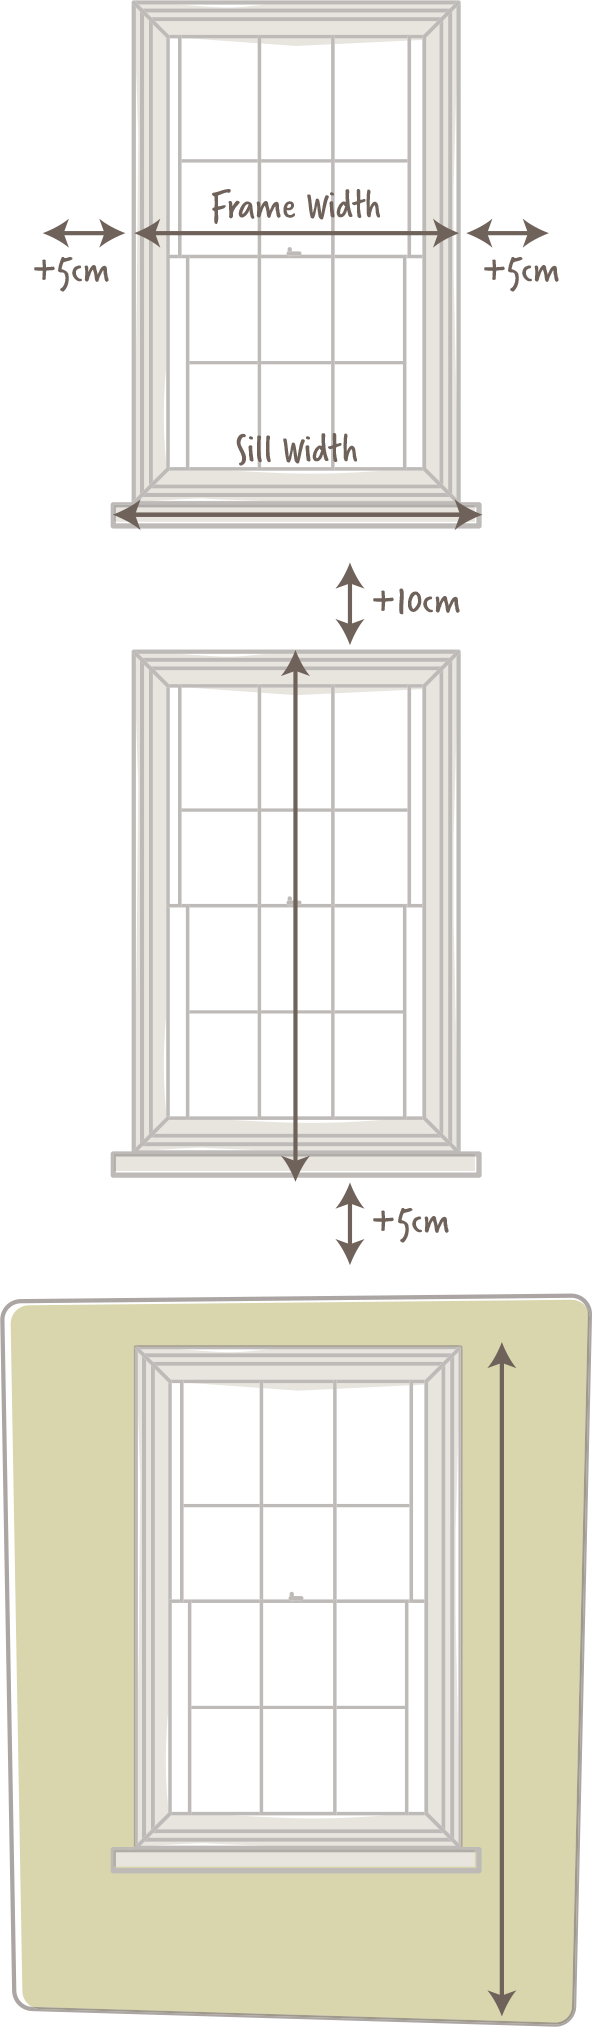
- Firstly, measure the width of the frame using a metal tape measure.
- Then, measure your sill width.
- We recommend adding 10cm to the frame width (5cm each side) for our Boeboes outside recess blinds to restrict light bleed, but you can choose to go only as wide as the sill width if you prefer. Once you have decided on your preferred width, submit this measurement to us!
- For the drop, measure between the top of the frame to the bottom of the sill. We’d suggest adding 10cm above and 5cm below to the blind drop to ensure your blind covers your window well, although you are welcome to go as high or low with the drop as you like.
- Then, simply decide which side you would like the chain to hang.
- Lastly, we’d like to know your installation height. This is the height from the floor to the top of the window and helps us determine how long to make your chain so you don’t have to reach up too high to work your blind!
Step 4
Installation
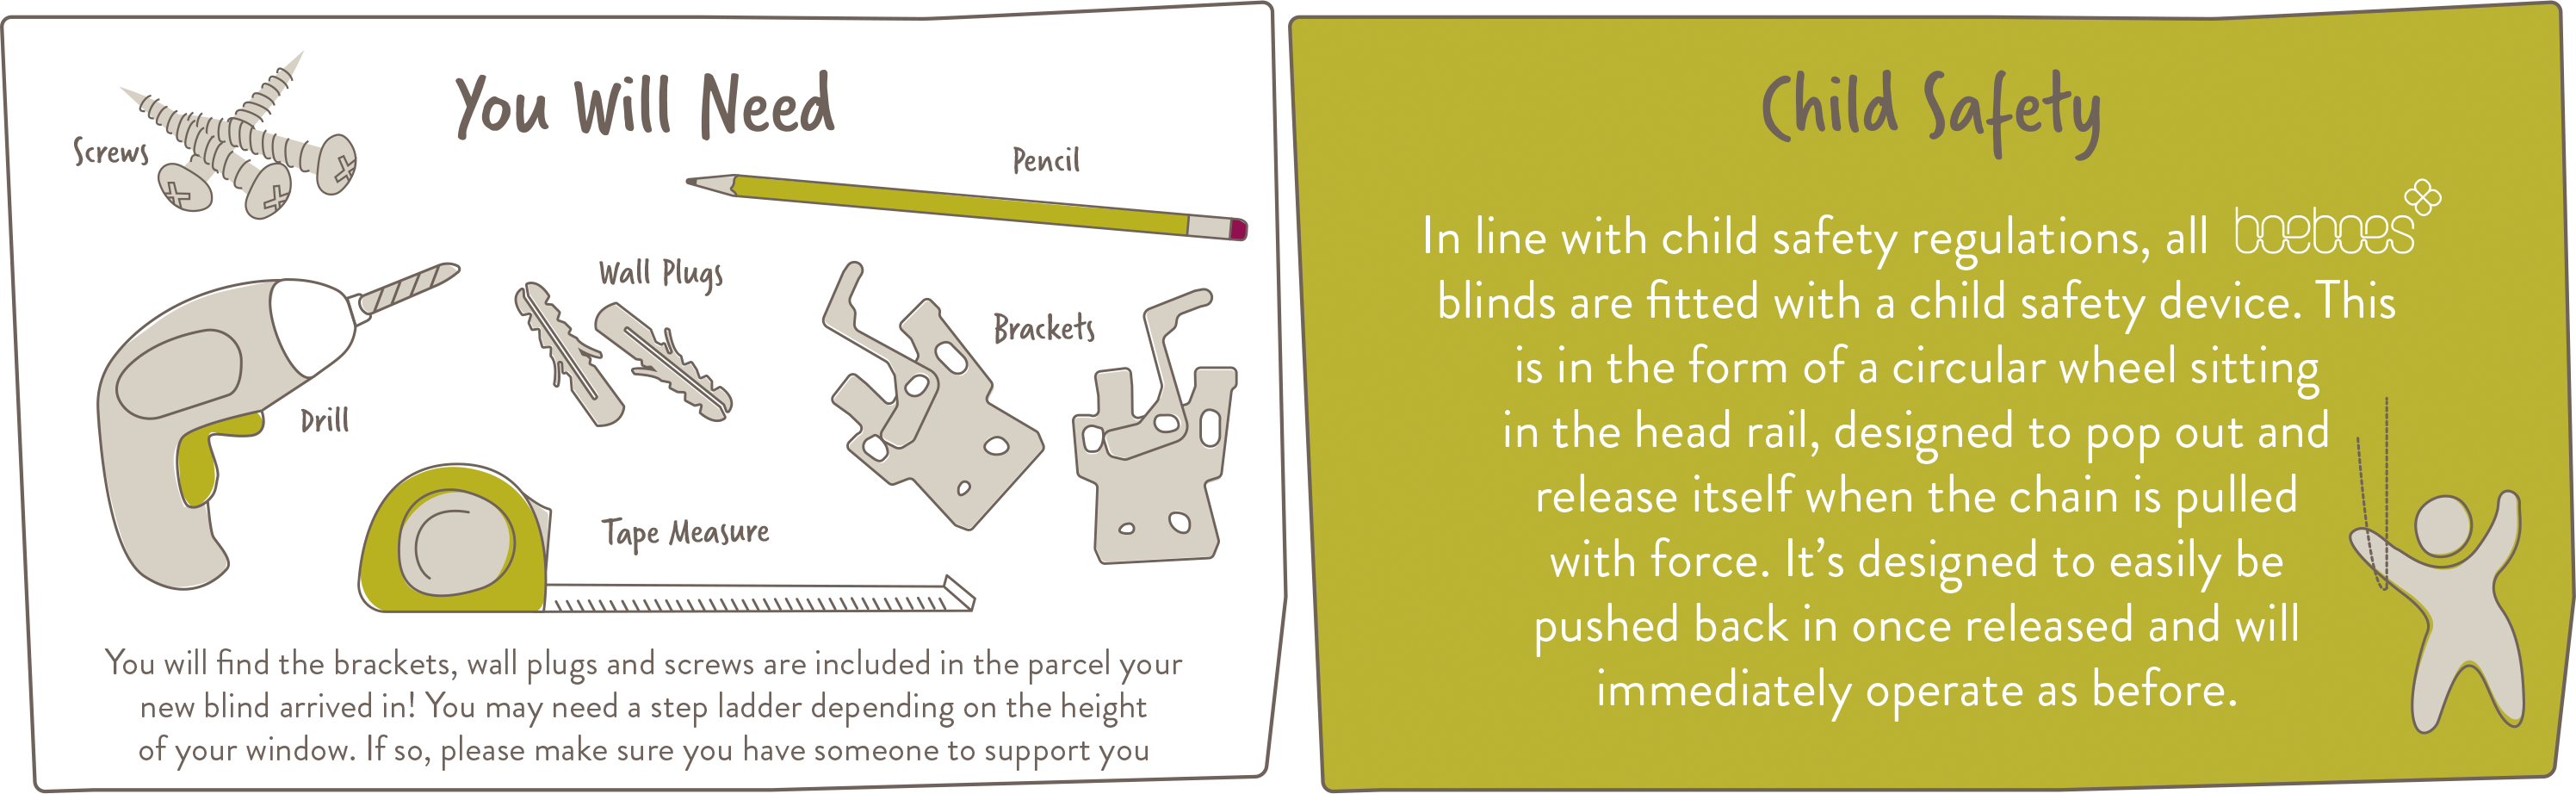
Once you have placed your order, we are happy to help you through the installation process too!
Follow the handy instruction guide that will arrive with your blind (or download it now) to make sure your blinds are hanging beautifully.
I'm installing...
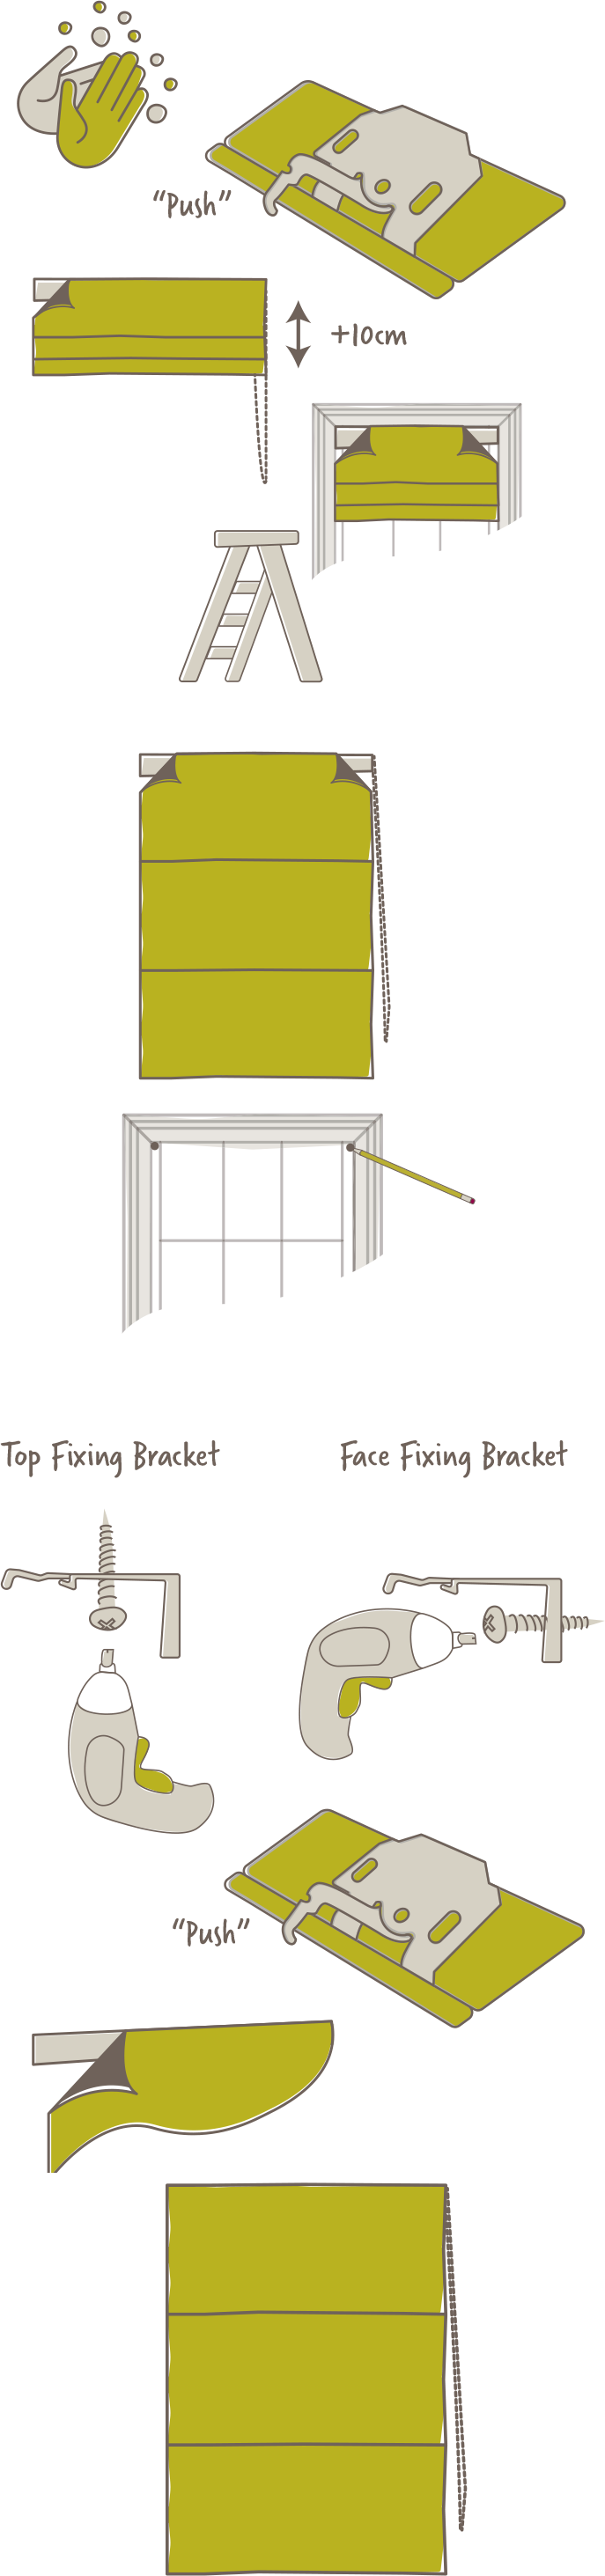
- Make sure your hands are clean!
- Brackets are supplied. Take a look to see how they will push into the head rail, once they are fixed in position.
- In order to hold the head rail comfortably whilst installing your blind, lower the blind by 10cm or so using the chain and peel off the fabric from the Velcro on the head rail.
- Hold your blind in position to see where it’s going to be fitted. Make sure someone is holding the step if you need extra height.
- Position the blind forward enough so that it doesn’t catch on any window catches or handles as it’s lowered!
- Make a mark with a pencil, where the brackets will need to be screwed into position. As a rule of thumb, we recommend you place your brackets 10cm of the way in from the left and right hand side of the window.
- Using your drill and screws, attach the brackets to the window frame or soffit of the window recess. There are two options when fixing brackets to your surface. You can either screw into the soffit of the window recess (top fixing). Or, drill the screws into the window frame (face fixing). If you are drilling into plasterboard, use the wall plugs.
- Push your blind into place and secure the brackets latch by sliding them firmly closed.
- Push the blind fabric back onto the Velcro attached to the head rail.
- Use the chain pull to lower the blind and you’re done! Stand back and admire your new blind!
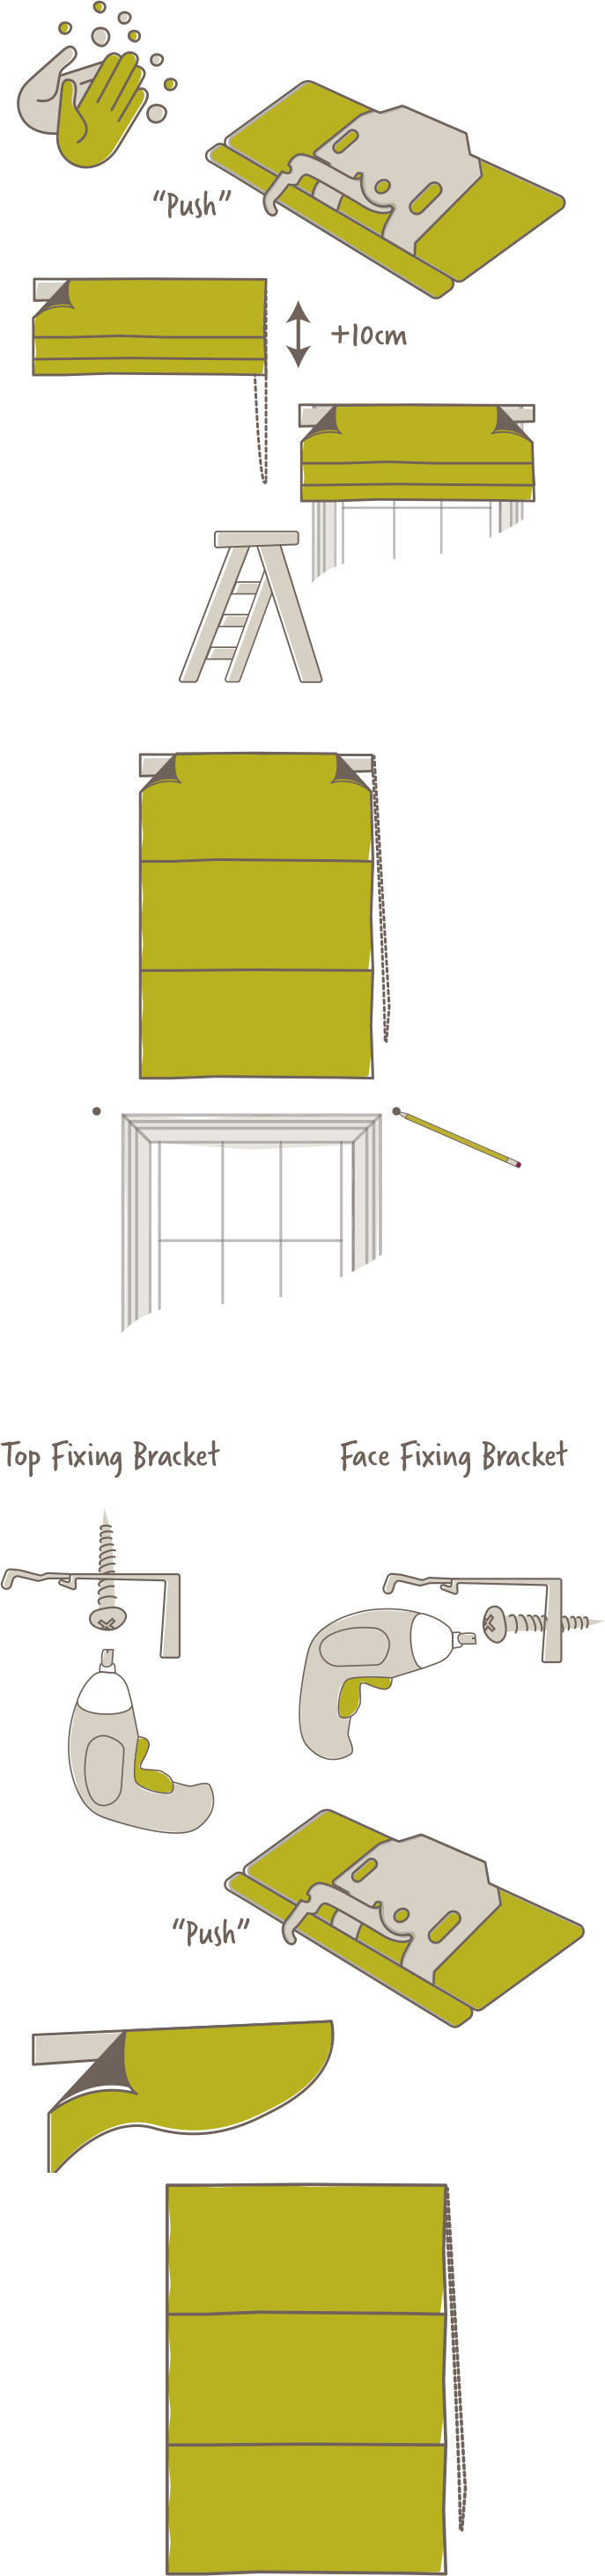
- Make sure your hands are clean!
- Brackets are supplied. Take a look to see how they will push into the head rail, once they are fixed in position.
- In order to hold the head rail comfortably whilst installing your blind, lower the blind by 10cm or so using the chain and peel off the fabric from the Velcro on the head rail.
- Hold your blind in position to see where it’s going to be fitted. Make sure someone is holding the step if you need extra height.
- Lower the blind and check the drop so that it’s just where you want it to be - either just sitting on the windowsill or just below. The choice was yours when you measured for it.
- Make a mark with a pencil, where the brackets will need to be screwed into position. As a rule of thumb, we recommend you place your brackets 10cm of the way in from the left and right hand side of the window.
- Using your drill and screws, attach the brackets to the wall. There are two options when fixing brackets to your surface. You can either screw into the ceiling (top fixing) or onto the wall or window frame (face fixing). If you are drilling into plasterboard, use the wall plugs.
- Push your blind into place and secure the brackets latch by sliding them firmly closed.
- Push the blind fabric back onto the Velcro attached to the head rail.
- Use the chain pull to lower the blind and you’re done! Stand back and admire your new blind!
Continue
View my BlindsFrequently Asked Questions
Help & Advice